
Hoy os traemos un DIY chulísimo dentro de nuestra sección de sostenibilidad creativa, Wood Morning!lLindsey de Savia Bruta os enseñó cómo hacer un jardín vertical a todos los que vinisteis al taller que hicimos en esta última edición de COCOMARKET. Los resultados no pudieron ser más diferentes y a cuál más bonito!
Sino te pudiste acercar al taller, hoy te explicamos paso a paso cómo hacer tu propio jardín vertical.
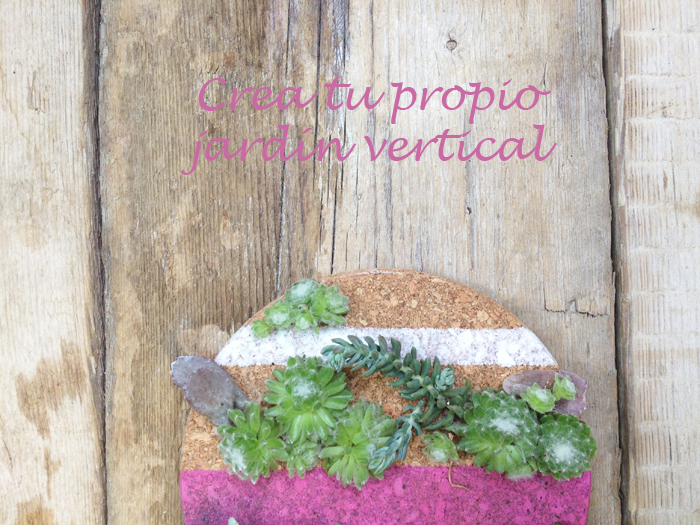
Cuando pensé en la idea de hacer un jardín vertical, pensé inmediatamente en planta crasa. Es un tipo de plata resistente y preciosa, el componente esencial de la decoración floral de bajo mantenimiento. También, quise utilizar elementos sencillos que todo el mundo puede tener a mano, o puede encontrar fácilmente. Vamos a por ello! Sólo necesitas una horita de tiempo libre y un poquito de creatividad.
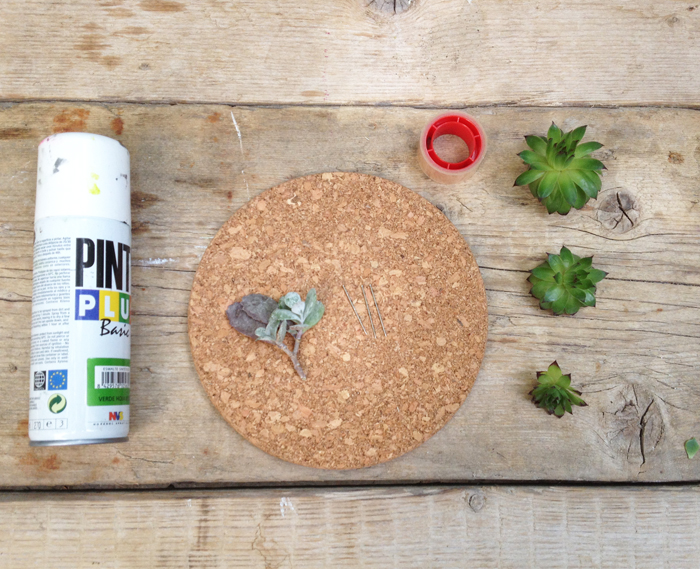
Materiales para este DIY:
– Salvamanteles de corcho
– Planta crasa (Sempervivum, etc.)
– Celofan o washit ape
– Pintura de spray
– Alfileres
– Clavo pequeño
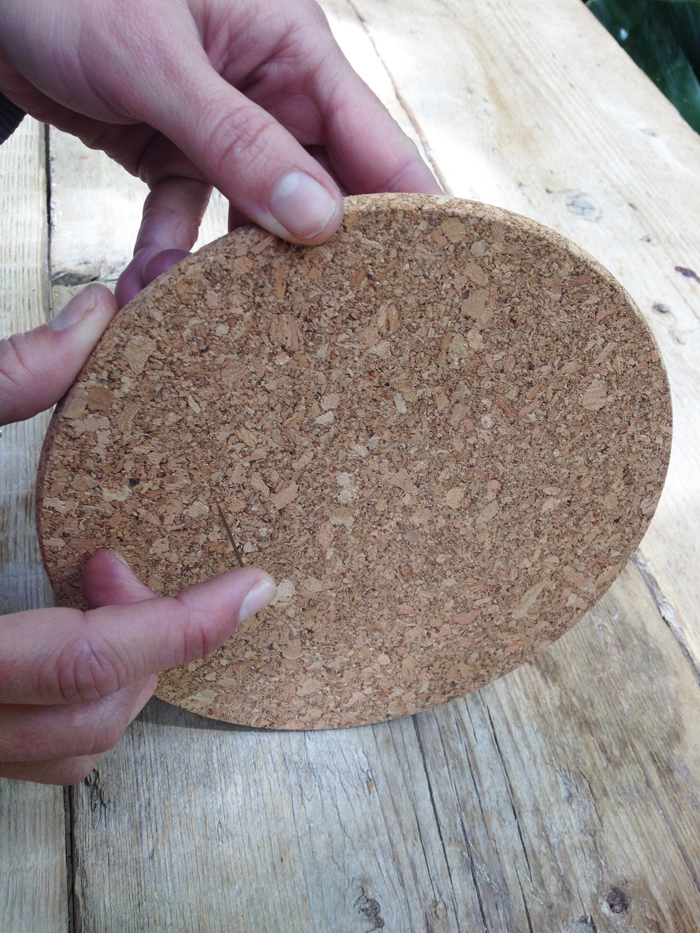
¿Qué es mas común que un salvamanteles? Hoy os enseño una forma muy fácil de transformar ese utensilio de cocina en el próximo regalo de cumpleaños : )
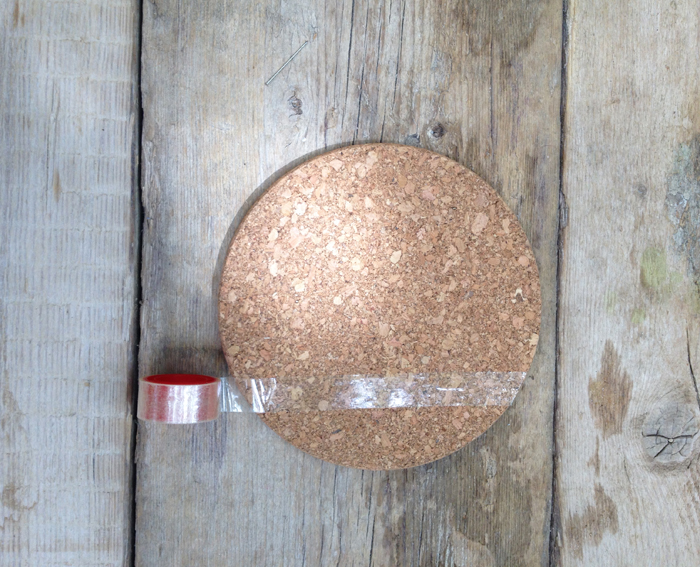
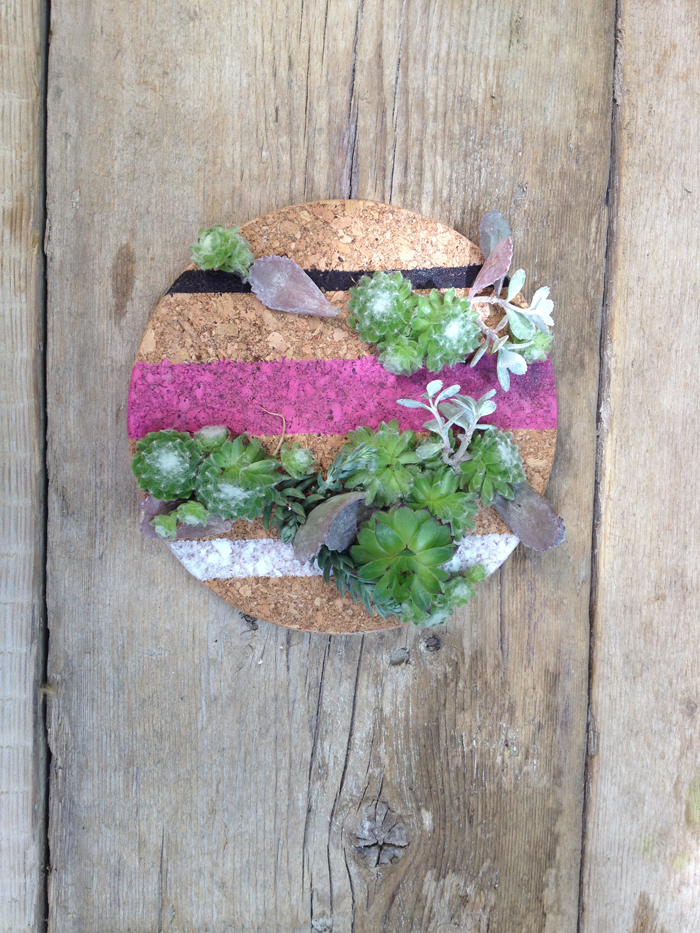
 Cubre las secciones del salvamanteles que quieres que retengan su color original con celofan o cinta de embalar. Yo quise hacer franjas de colores, pero usa tu imaginación. En un lugar adecuado, pinta las secciones que has dejado descubierto. Puedes usar tantos colores como quieras. Cuando la pintura se haya secado por completo, quita la cinta.
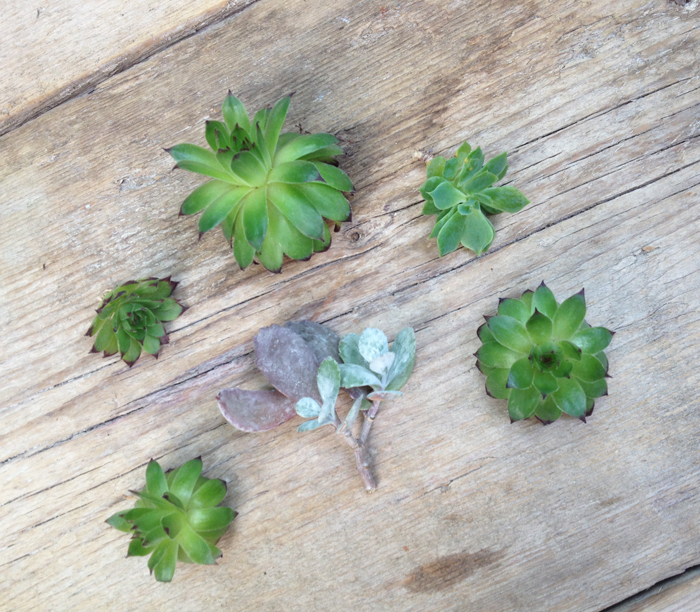
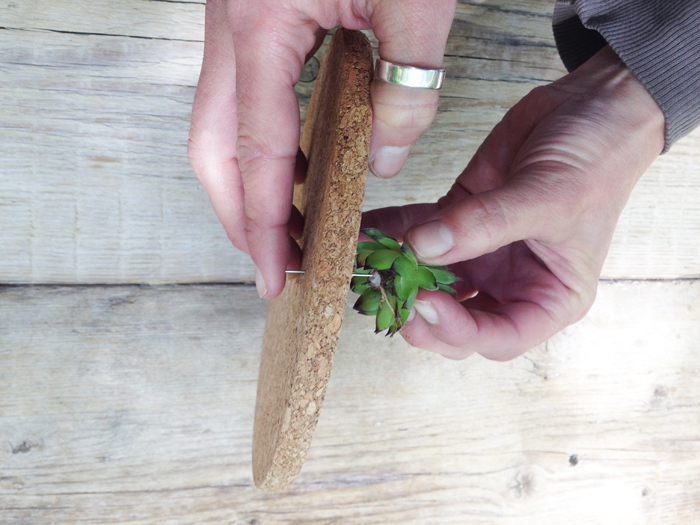
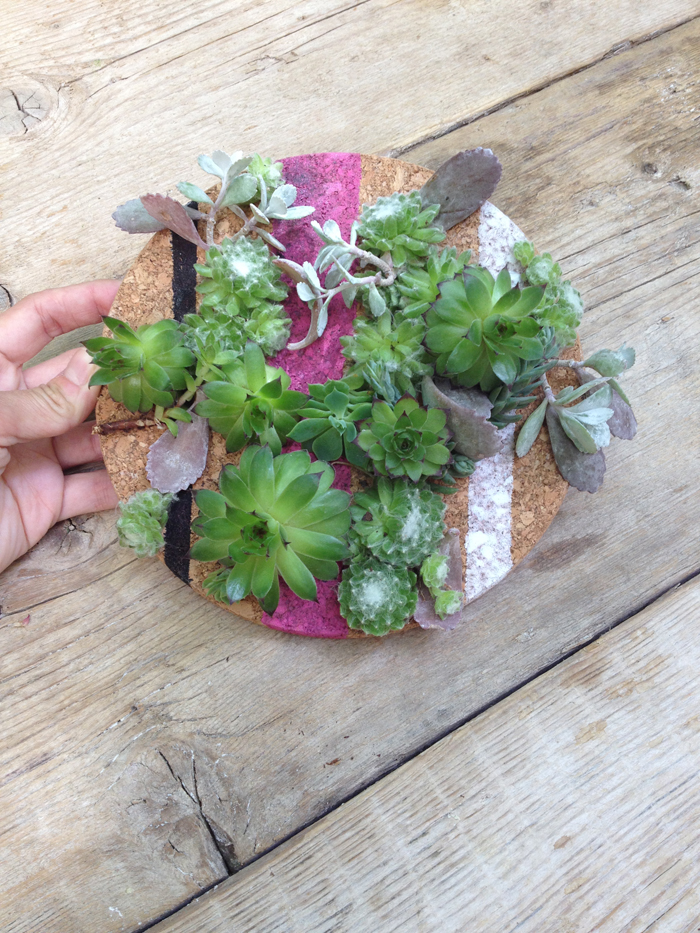
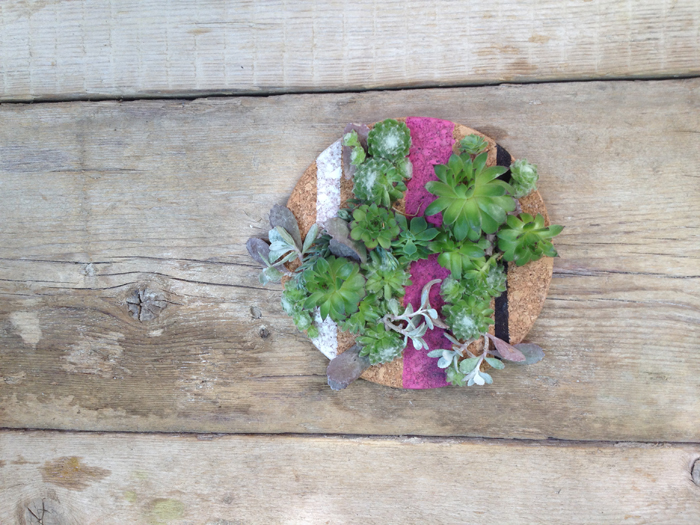
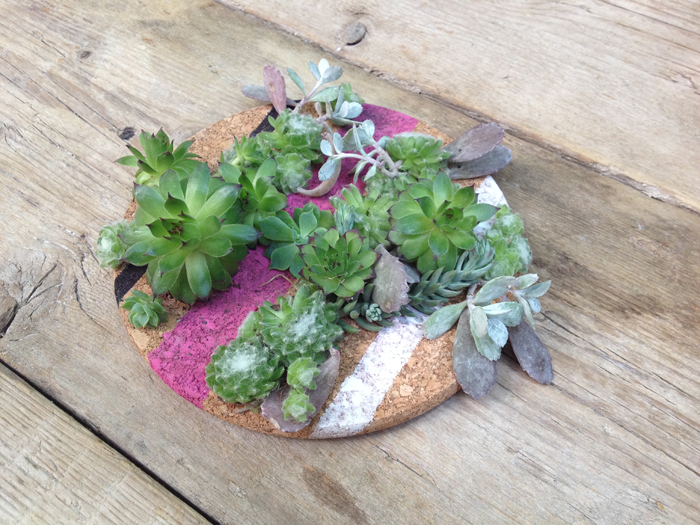
 Arranca las rosetas de las plantas de la superficie de la tierra. Se pueden quitar las raíces o simplemente las hojas secas. Antes de empezar a clavar, piensa el diseño y colocación de tus plantas en el corcho. Cuando estés preparado, elige el lugar donde colocaras la primera planta, y busca donde corresponde ese lugar por otro lado del salvamantel. Clava el alfiler hasta que atraviese el corcho por el otro lado, y donde sobresalga la punta del alfiler comienza a clavar las plantas. Las cabezas de los alfileres quedaran en el lado que irá pegado a la pared, cuando colguemos nuestros jardín vertical.
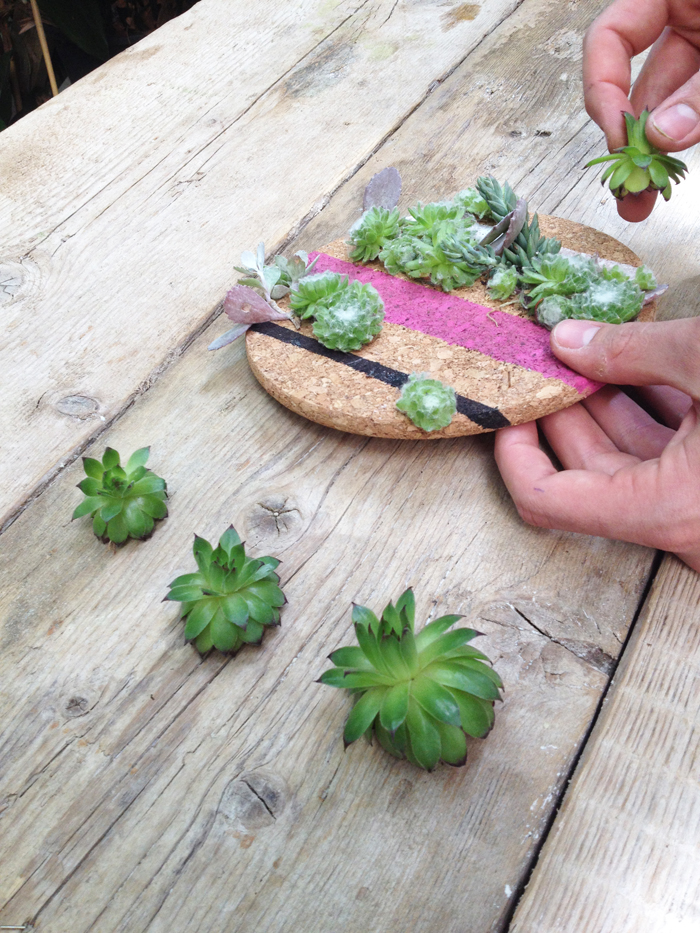
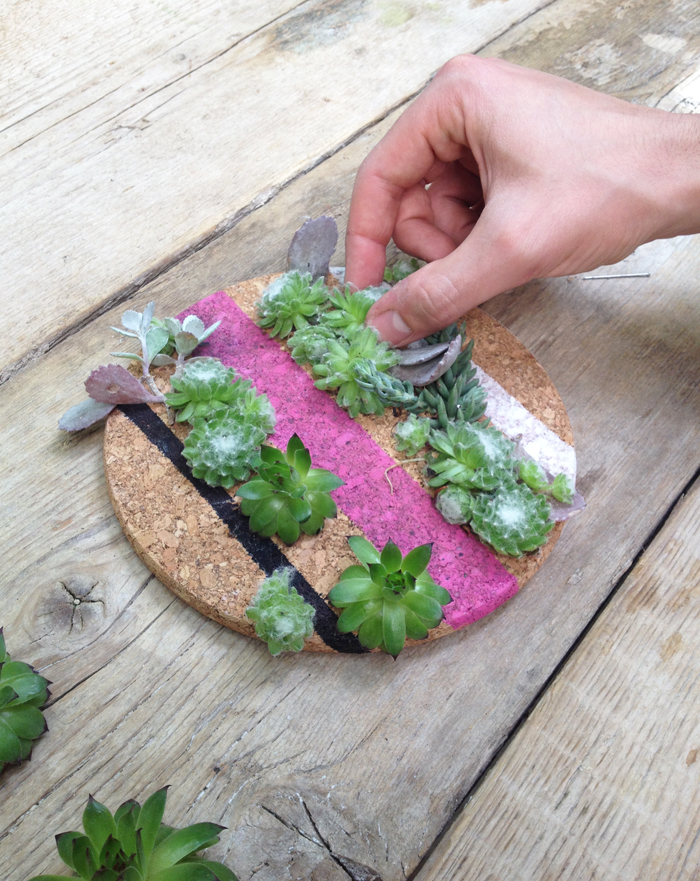
Dejo lo demás en tus manos! Puedes añadir todas las plantas que quieras!

 Para colgarlo, inserta un clavo en la parte de atrás. Mantén tus suculentas felices echándoles agua de una botella de spray semanalmente (mas o menos). Regálalo a alguien o a ti mismo!
Espero que practiquéis este fácil y original DIY ¿Quién se anima? Me encantará ver vuestras creaciones a través de Instagram #woodmorningdiy @hervideroideas @saviabrutaflor
Feliz jueves!
– Lindsey –
Fotografía: El Hervidero de Ideas
——————————————————————————————————————
When proposed with the idea to make a vertical garden, I immediately thought of succulents. Resistent and beautiful, they are the essential component to a low mantainance floral home decoration. I also wanted to use simple ingredients that everyone has on hand, or could easily find. There is no mystery here, folks. All you need is about an hour or so of free time and a bit of creativity.
Ingredients:
Cork hot plate
Succulents (Seprevivum, etc.)
Masking tape
Spray paint
Pins
Small nail
So what could be more common place than a cork hot plate? Here is a easy way to transform this kitchen tool into someone’s next birthday gift.
Cover the sections of the hot plate that you want to retain their original color with masking tape. I chose to work in stripes, but really your imagination is the limit. In a safe area, paint the sections that you have left uncovered. I chose three different colors. You can use as many as you want or just one. When the paint has fully dried, remove the masking tape.
Pull out the succulents from the surface of the pot. You can break off the roots or simply clean off the dead leaves and leave a bit of the root system. Before you begin, you might want to think about the general design of how you are going to place the plants. When you are ready, choose the spot where you will be placing the first one, and find where that area corresponds on the back side of the hot plate. Poke the pin from the back side through the cork and pin the succulent to it on the front side. If you find that the pins are too long, you might want to cut them, at an angle, with pliers.
The rest is really up to you! Add as much or as little as your little heart desires.
To make this puppy hang, you can insert a little nail to the back. Keep your succulents happy by spaying them weekly (more or less, just keep an eye on them) with water. Give as a gift to others or to yourself!
Happy thursday!
– Lindsey –